Section: 18
Hours: 2
The balloon on the pressurized tank stayed inflated overnight!!!
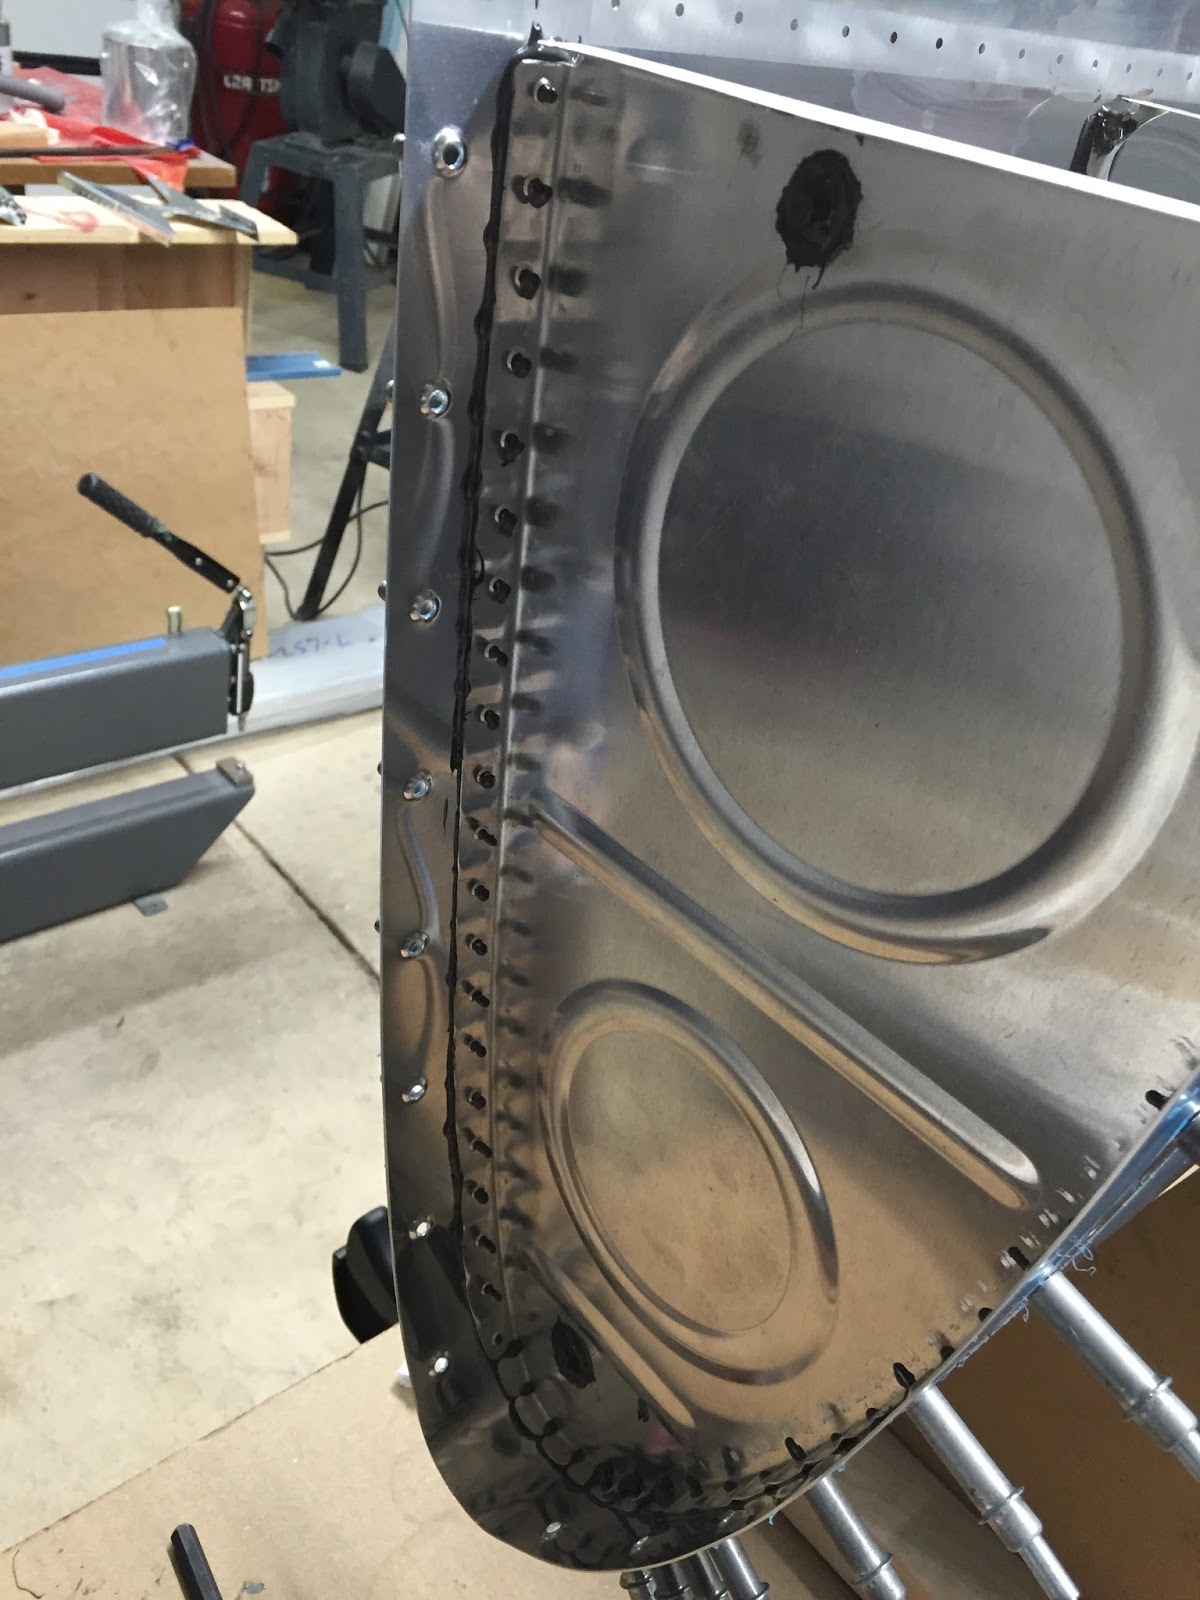
I feel confident the tank doesn't have leaks at this point so I bolted and screwed it onto the spar! I had a problem getting one of the bolts started on the right tank. Today I was extra careful to finger tighten each bolt to make sure it was fully engaged with the first thread of the nut plate before I put the wrench to it. I successfully got all the bolts torqued (42 in#) and marked.
Section: 20
Hours: 4
I finished off the day prepping and dimpling the bottom wing skins.
Disclaimer: This blog is to provide others insight into my experience and for my own historical purposes. Airplane construction is a serious affair. I have no authoritative skills relating to airplane construction. As such, any use of the information contained on this blog is at your own risk.
Showing posts with label Section 18. Show all posts
Saturday, May 14, 2016
Friday, May 13, 2016
Section: 18
Hours: 1
The green balloon didn't stay inflated overnight. I pumped the tank up again and spayed soapy water around looking for the leak. All I could find was a leak at the balloon. Here's the bubbles around the balloon neck.
I had tried tie wraps and electrical tape to secure the balloon to no avail. I also tried looping some wire around the electrical tape and twisting it to clamp it down but that leaked also. Finally I thought to use some rubber strand (FAI contest rubber for indoor model airplanes) looped, stretched and tied off at the end of the balloon. Rubber from a rubber band would probably also work. I pumped up the tank around noon and the balloon is still inflated this evening. All my tank leaks so far have been at the threaded fittings, the gas cap or the test apparatus. I've been a little anal about pursuing this, but I really don't want to chase down gas leaks after the tanks are installed. Much easier to address any leaks while I have full access to the tank. Hopefully tomorrow morning the balloon will still be inflated.
Section: 20
Hours: 4
I started work on the bottom skins. It looks like they are going to fit very nicely with a very small gap to the leading edge skins.
I finished up the edges and final drilled the holes for the 6 access panels and started work on the ADAHRS mounting plate. I'm not sure if I'll be actually putting my ADAHRS on this plate- I think the Garmin ADAHRS can be mounted on the panel in the cockpit. I'm going to install the plate anyway to fill the holes in the bottom skin and maybe it will be useful for some other purpose later on.
Hours: 1
The green balloon didn't stay inflated overnight. I pumped the tank up again and spayed soapy water around looking for the leak. All I could find was a leak at the balloon. Here's the bubbles around the balloon neck.
I had tried tie wraps and electrical tape to secure the balloon to no avail. I also tried looping some wire around the electrical tape and twisting it to clamp it down but that leaked also. Finally I thought to use some rubber strand (FAI contest rubber for indoor model airplanes) looped, stretched and tied off at the end of the balloon. Rubber from a rubber band would probably also work. I pumped up the tank around noon and the balloon is still inflated this evening. All my tank leaks so far have been at the threaded fittings, the gas cap or the test apparatus. I've been a little anal about pursuing this, but I really don't want to chase down gas leaks after the tanks are installed. Much easier to address any leaks while I have full access to the tank. Hopefully tomorrow morning the balloon will still be inflated.
Section: 20
Hours: 4
I started work on the bottom skins. It looks like they are going to fit very nicely with a very small gap to the leading edge skins.
I finished up the edges and final drilled the holes for the 6 access panels and started work on the ADAHRS mounting plate. I'm not sure if I'll be actually putting my ADAHRS on this plate- I think the Garmin ADAHRS can be mounted on the panel in the cockpit. I'm going to install the plate anyway to fill the holes in the bottom skin and maybe it will be useful for some other purpose later on.
Thursday, May 12, 2016
Section: 18
Hours: 6
After a couple false starts over the last couple days I successfully pressure tested my tanks. Initially I had a major leak at the air valve and hose assembly used for pumping air into the right tank. After tightening down the hose clamps I was able to get the balloon to inflate and stay inflated. I sprayed down all the seams and rivets on the tank with soapy water and was not able to see any leaks. The balloon held for 5 hours until a humming bird flew up to it and popped it!
I got in a rush and immediately started testing the left tank without any success. Then I remembered I hadn't applied thread sealant or torqued down the drain sump, fuel strainer or the return line plug. I took care of that and pumped up the tank only to remember I hadn't taped over the gas cap. It took me 2 tries to get the gas cap sealed up with tape. The green balloon is now staying inflated. I'll check it again in the morning. Hopefully the humming bird won't be attracted to a green balloon.
Between testing the tanks, I did the prep work on the aileron and flap gap seal pieces. Van's just issued a SB for cracking around the inboard aileron support bracket. I've already riveted everything in place and the SB advises not redoing it unless a crack later developes. I did trim the corner of the aileron gap seal per the SB to make inspection easier.
I spent a large part of the afternoon attaching the right tank to the wing. Lots of bolts and screws. I found the drag friction on the z-flange attach point AN3 bolts was about 18 in# so I torqued them to the recommended 20-25 in# plus the 18 in# of drag for a total of 43 in#.
Hours: 6
After a couple false starts over the last couple days I successfully pressure tested my tanks. Initially I had a major leak at the air valve and hose assembly used for pumping air into the right tank. After tightening down the hose clamps I was able to get the balloon to inflate and stay inflated. I sprayed down all the seams and rivets on the tank with soapy water and was not able to see any leaks. The balloon held for 5 hours until a humming bird flew up to it and popped it!
I got in a rush and immediately started testing the left tank without any success. Then I remembered I hadn't applied thread sealant or torqued down the drain sump, fuel strainer or the return line plug. I took care of that and pumped up the tank only to remember I hadn't taped over the gas cap. It took me 2 tries to get the gas cap sealed up with tape. The green balloon is now staying inflated. I'll check it again in the morning. Hopefully the humming bird won't be attracted to a green balloon.
Between testing the tanks, I did the prep work on the aileron and flap gap seal pieces. Van's just issued a SB for cracking around the inboard aileron support bracket. I've already riveted everything in place and the SB advises not redoing it unless a crack later developes. I did trim the corner of the aileron gap seal per the SB to make inspection easier.
I spent a large part of the afternoon attaching the right tank to the wing. Lots of bolts and screws. I found the drag friction on the z-flange attach point AN3 bolts was about 18 in# so I torqued them to the recommended 20-25 in# plus the 18 in# of drag for a total of 43 in#.
Wednesday, May 4, 2016
Section: 16
Hours: 6
I washed, acid etched and primed the wing skins today.
Section: 18
Hours: 1
Between washing and acid etching the wing skins, I finished counter-sank and riveted the remaining holes.
I also dabbed some more ProSeal on the pop rivets in the rear baffle.
More ProSeal was applied to the shop heads and corner where the baffle meets the end rib. That should be it with the ProSeal for awhile!!!!
Hours: 6
I washed, acid etched and primed the wing skins today.
Section: 18
Hours: 1
Between washing and acid etching the wing skins, I finished counter-sank and riveted the remaining holes.
I also dabbed some more ProSeal on the pop rivets in the rear baffle.
More ProSeal was applied to the shop heads and corner where the baffle meets the end rib. That should be it with the ProSeal for awhile!!!!
Tuesday, May 3, 2016
Section: 18
Hours: 6
Today I closed out the left tank.
Everything layed out and ready to go. I've been using a gram scale to weigh the ProSeal part A and B. Today I mixed up about 74 grams of ProSeal and it was just enough to do the job. I've almost finished off 1 can of the white B part in the process of assembling 2 wing tanks.
Here's today's 74 grams of smelly gooey sealer.
I kept my gloves clean enough I was able to grab the iPhone to take a picture of the application of ProSeal. The end rib flanges are buttered over the whole surface, the interior rib flanges just have a thin coat over the rivet holes. The wing skin mating surfaces have a thin coat with a thicker bead just below the rivet line. I applied all the ProSeal using the popsicle stick seen in the mixing bowl above. Just like applying peanut butter to a sandwich...
When I did the right tank, a lot of ProSeal got pushed out of the rivet holes and made a big mess. This time I applied masking tape to the outside of the rivet line to keep the ProSeal from squeezing though while I applied it.
The z-flanges are riveted in at this point. Next I remove every other cleco and insert and squeeze a rivet. When I finish that, I remove the remaining clecos and squeeze the rest of the rivets.
Here's a finished row of rivets. Every 10th hole still has a cleco because the instructions have you not countersink those holes until after the ProSeal has cured. I'll be returning to them tomorrow to finish up.
Here's what the shop heads look like.
I had some time left after cleaning ProSeal off a couple hundred clecos so I decided to make the replacement for the left W-1027B wing walk double that I screwed up last week.
Hours: 6
Today I closed out the left tank.
Everything layed out and ready to go. I've been using a gram scale to weigh the ProSeal part A and B. Today I mixed up about 74 grams of ProSeal and it was just enough to do the job. I've almost finished off 1 can of the white B part in the process of assembling 2 wing tanks.
Here's today's 74 grams of smelly gooey sealer.
I kept my gloves clean enough I was able to grab the iPhone to take a picture of the application of ProSeal. The end rib flanges are buttered over the whole surface, the interior rib flanges just have a thin coat over the rivet holes. The wing skin mating surfaces have a thin coat with a thicker bead just below the rivet line. I applied all the ProSeal using the popsicle stick seen in the mixing bowl above. Just like applying peanut butter to a sandwich...
When I did the right tank, a lot of ProSeal got pushed out of the rivet holes and made a big mess. This time I applied masking tape to the outside of the rivet line to keep the ProSeal from squeezing though while I applied it.
The z-flanges are riveted in at this point. Next I remove every other cleco and insert and squeeze a rivet. When I finish that, I remove the remaining clecos and squeeze the rest of the rivets.
Here's a finished row of rivets. Every 10th hole still has a cleco because the instructions have you not countersink those holes until after the ProSeal has cured. I'll be returning to them tomorrow to finish up.
Here's what the shop heads look like.
I had some time left after cleaning ProSeal off a couple hundred clecos so I decided to make the replacement for the left W-1027B wing walk double that I screwed up last week.
Monday, May 2, 2016
Section: 18
Hours: 3
I counter-sank and riveted the remaining holes in the right tank baffle and dabbed some ProSeal on all the pulled rivets using a toothpick.
Then I prepped the baffle and z-stiffeners for the left tank. After match drilling the z-stiffeners I spent some time vacuuming all the dust and chips out of the tanks and wiped down the inside. This will be the last time I can easily clean the inside of the tank.
I scuffed the flange and ends of the tank baffle to improve adhesion with the ProSeal.
I got everything prepped and laid out so I can get an early start tomorrow morning. It's better to spread the ProSeal on when it is a little cooler in the garage.
Hours: 3
I counter-sank and riveted the remaining holes in the right tank baffle and dabbed some ProSeal on all the pulled rivets using a toothpick.
Then I prepped the baffle and z-stiffeners for the left tank. After match drilling the z-stiffeners I spent some time vacuuming all the dust and chips out of the tanks and wiped down the inside. This will be the last time I can easily clean the inside of the tank.
I scuffed the flange and ends of the tank baffle to improve adhesion with the ProSeal.
I got everything prepped and laid out so I can get an early start tomorrow morning. It's better to spread the ProSeal on when it is a little cooler in the garage.
Wednesday, April 27, 2016
Section: 18
Hours: 10
I decided to take advantage of the cooler weather today to do some more ProSeal work. ProSeal cures less rapidly when it is cooler which makes it easier to accomplish the work before it starts getting stiffer and stickier and gooier...
First up I installed the fuel level gauges. It took me awhile to figure out that there is a left and a right version. They aren't complete mirror images of each other, but the way they are attached to the mounting flange is different by 180°. I bent one of the legs not accounting for the radius of the bend and the arm ended up too long. I was afraid to straighten the bend so I put a kink in the arm to compensate (left gauge in pic below).
The mounting flange has an irregular spacing for the holes and only aligns with the tank assembly when the "MEXICO" stamping is towards the nose of the tank as seen here. After installing with a 1/16" thick layer of ProSeal you tighten down the screws to get a 1/32" layer. Then you check to make sure the lock washer behind 1 of the screws is properly making electrical contact between the tank and the flange.
Here's the gauge flange with the ProSeal squeezed out all around.
Inside view of the ProSeal squeeze out after tightening the screws.
Here's the left and right tanks next to each other showing the orientation of the gauges.
Here's the tank vent line connection at the inner rib. I initially wasn't sure if the nut that sits in the socket on the rib was supposed to have ProSeal applied. Early in the construction manual chapter it states that all mating parts or any place that fuel can seep through should be sealed with ProSeal. A couple threads on the Van's Airforce web site confirmed this also, so I slathered some ProSeal behind the nut before torquing it down and for good measure dabbed some on the outside of the nut.
Here's the outside of the vent line connection and the fuel gauge plate.
I had to bend the vent line more sharply to leave the required 1/4" clearance from the outside rib.
Now the hard part- I applied a bead of ProSeal using a popsicle stick on the tank skin mating area and the flanges of the end ribs. I also applied a thin dab where the z-stiffener rivets go into the rib flanges on the interior ribs. Then you slide the back baffle in (taking care to properly orient the baffle flange with the "EXTRA" hole on the bottom). Then apply a gazillion clecos and check that the ProSeal is properly squeezed out. If you leave too thick a ProSeal layer it can impact the fit between the tank and the wing spar.
Here's the baffle after clecoing and pulling the rivets on the z-stiffeners.
Then I squeezed the flange rivets leaving every tenth hole with a cleco inserted.
The flanges of the end ribs get solid rivets which I set using the rivet gun and bucking bar. That was especially messy because the ProSeal squeezed out of the end seam while riveting.
Here's the baffle with the rivets set. I haven't dabbed extra ProSeal on the heads of the rivets yet.
Hours: 10
I decided to take advantage of the cooler weather today to do some more ProSeal work. ProSeal cures less rapidly when it is cooler which makes it easier to accomplish the work before it starts getting stiffer and stickier and gooier...
First up I installed the fuel level gauges. It took me awhile to figure out that there is a left and a right version. They aren't complete mirror images of each other, but the way they are attached to the mounting flange is different by 180°. I bent one of the legs not accounting for the radius of the bend and the arm ended up too long. I was afraid to straighten the bend so I put a kink in the arm to compensate (left gauge in pic below).
The mounting flange has an irregular spacing for the holes and only aligns with the tank assembly when the "MEXICO" stamping is towards the nose of the tank as seen here. After installing with a 1/16" thick layer of ProSeal you tighten down the screws to get a 1/32" layer. Then you check to make sure the lock washer behind 1 of the screws is properly making electrical contact between the tank and the flange.
Here's the gauge flange with the ProSeal squeezed out all around.
Inside view of the ProSeal squeeze out after tightening the screws.
Here's the left and right tanks next to each other showing the orientation of the gauges.
Here's the tank vent line connection at the inner rib. I initially wasn't sure if the nut that sits in the socket on the rib was supposed to have ProSeal applied. Early in the construction manual chapter it states that all mating parts or any place that fuel can seep through should be sealed with ProSeal. A couple threads on the Van's Airforce web site confirmed this also, so I slathered some ProSeal behind the nut before torquing it down and for good measure dabbed some on the outside of the nut.
Here's the outside of the vent line connection and the fuel gauge plate.
I had to bend the vent line more sharply to leave the required 1/4" clearance from the outside rib.
Now the hard part- I applied a bead of ProSeal using a popsicle stick on the tank skin mating area and the flanges of the end ribs. I also applied a thin dab where the z-stiffener rivets go into the rib flanges on the interior ribs. Then you slide the back baffle in (taking care to properly orient the baffle flange with the "EXTRA" hole on the bottom). Then apply a gazillion clecos and check that the ProSeal is properly squeezed out. If you leave too thick a ProSeal layer it can impact the fit between the tank and the wing spar.
Here's the baffle after clecoing and pulling the rivets on the z-stiffeners.
Then I squeezed the flange rivets leaving every tenth hole with a cleco inserted.
The flanges of the end ribs get solid rivets which I set using the rivet gun and bucking bar. That was especially messy because the ProSeal squeezed out of the end seam while riveting.
Here's the baffle with the rivets set. I haven't dabbed extra ProSeal on the heads of the rivets yet.
Wednesday, January 13, 2016
Section: 18
Hours: 3
I installed the vent line, tank attach bracket and inboard upper rib in the right gas tank this afternoon. I'm now going to let both tanks cure for awhile before water testing.
Hours: 3
I installed the vent line, tank attach bracket and inboard upper rib in the right gas tank this afternoon. I'm now going to let both tanks cure for awhile before water testing.
The vent tube runs through a lug on the gas cap flange and ends 1/4" from the outboard rib.
On the other end, the vent tube has a flared end with a fitting that will screw into a treaded coupler that goes through the inboard rib.
The inside of the inboard rib has a fillet of ProSeal all around.
The outside of the inboard nose rib and front of the attach bracket. Extra ProSeal is slobbered into the corners where leaks have been reported to develop on other RV-14's under construction.
I applied extra ProSeal into the corners on the other side of the attach bracket also.
Right tank with all the ribs riveted and ProSealed. Water testing will be next after the ProSeal cures. Finally the rear baffle will be added and the tanks will be done!
Monday, January 11, 2016
Section: 18
Hours: 8
The advantage of having 2 tanks to build is that the second one is easier. The disadvantage is there is twice as much work! Today I riveted in 3 more ribs and the j-stiffener on the right tank.
Hours: 8
The advantage of having 2 tanks to build is that the second one is easier. The disadvantage is there is twice as much work! Today I riveted in 3 more ribs and the j-stiffener on the right tank.
Here's what I've been using for handling the ProSeal. I always have a pile of paper towel wipes about 3" x 4" ready for cleaning. I keep a paper cup of acetone half filled. I dip a paper towel wipe in the acetone and then wipe off my fingers, bucking bar, clecos, etc. as needed while working. A real key to keeping the mess from spreading is to clean after each step of assembly. I use tooth picks for dabbing a little ProSeal in each hole before inserting a rivet. The q-tips come in handy for cleaning and for dabbing on extra ProSeal on each rivet head. I use popsicle sticks for mixing and spreading / buttering the ribs and for applying fillets where needed. I do all my mixing in paper bowls. The gram scale is very accurate for measuring the A and B parts in the 10:1 proportion required.
I wrote a little program to help with the weights and measures on the GraphNCalc83 app running on my iPhone ( https://itunes.apple.com/us/app/graphncalc83/id744882019?mt=8 ). To start a new batch of ProSeal, I first weigh the paper bowl and enter the Tare weight (typically 10 grams, but can vary bowl to bowl). Then I add the white part A of the ProSeal to the paper bowl and weigh the result and input it to the program Tare+A prompt. The program then calculates the total weight after adding the appropriate amount of part B. I set the scale to the calculated total and add the black part B until the scale balances. This may seem like over kill for a simple calculation, but it works really well, especially after breathing ProSeal fumes for several hours. The calculator doesn't lie :-)
I've been using about 30 grams of ProSeal for each rib. That is sufficient for buttering the flanges and dabbing an extra coat on the shop heads with some excess left over. I think an advantage of doing wet riveting is that you can use less ProSeal and still get good squeeze out and a good seal. I'm still working off the 1st quart can of ProSeal with 2 tanks nearly finished. I may finish up the whole job with just 1 quart.
Here is the outboard rib immediately after buttering and inserting it into the skin with some clecos. You can see some squeeze out is already occurring and the ends of the rivets I've inserted have a dab of ProSeal on the ends (which gets all over the bucking bar and makes a big mess...).
Here's the squeeze out on the inside after just clecoing.
Here I've inserted rivets in the holes between the clecos and I'm about ready to start riveting. Before inserting each rivet, I dab a little ProSeal with a toothpick in the hole to make sure the rivet gets sealed.
Here's the end result after riveting and dabbing ProSeal on each of the shop heads.
I added ProSeal on the inside to form a 3/8" fillet (end ribs only).
After putting in the ribs, I added the j-stiffener. Again, I enlisted Deb to help me insert the stiffener to minimize the mess.
Here I am dabbing ProSeal on each rivet of the j-stiffener. You just have to be patient and keep at it. The tanks have a lot more detail work that must be done right or you will end up with leaky tanks. The tanks on my Mooney have started leaking after 48 years of service so I'm a little sensitive about leaking fuel tanks- I'm happy to put in the extra work now to avoid fuel leaks in the future (not that I'm going to be flying 48 years from now)...
Here's one of the ribs in the middle of the tank showing the squeeze out and rivet head sealing.
The right tank is almost done. The end of ProSeal mess is nearing- just another couple days of work.
Subscribe to:
Posts (Atom)